Today we’re going to talk about migrating from the standard to the enhanced data model in Power Pages. If you’ve been working with PowerApps portals, Power Pages, or ADX Studio portals for a while, you know that all the metadata used to define your web pages, templates, and content snippets is stored as data within Dataverse tables. Traditionally, provisioning a Power Pages website meant installing numerous solutions and tables, which could clutter your Dataverse environment. However, Microsoft’s new enhanced data model changes this by integrating core Power Pages tables directly into Dataverse, making the whole process more efficient. In this blog post, we will explore the benefits of the enhanced data model and guide you through the migration process using the tools Microsoft has provided, now available in public preview.
Here’s a simple comparison between the standard data model and the enhanced data model in Power Pages:
| Feature/Aspect | Standard Data Model | Enhanced Data Model |
| Data Storage | Metadata stored in numerous Dataverse tables, often with adx_ prefix. | Metadata integrated into core Dataverse tables. |
| Solution Management | Clunky, with many additional solutions and tables loaded into Dataverse. | More streamlined, with fewer solutions and tables needed. |
| Performance | Can be slower due to the bloat of additional tables and solutions. | Improved performance with efficient data storage and management. |
| Ease of Migration | Challenging to move configurations between environments. | Easier migration with support for JSON format and virtual tables. |
| Scalability | Limited scalability due to clutter and complexity. | Better scalability with a cleaner and more efficient setup. |
| Configuration Types | Primarily configuration data, with transactional data handled separately. | Supports configuration, transactional data, or both together. |
| Update Management | Requires manual updates and management of custom solutions. | Automatically managed by Microsoft, ensuring up-to-date core tables. |
| Setup Process | Involves installing multiple solutions during provisioning. | Simplified setup with core tables pre-installed in Dataverse. |
| Pipeline Deployments | Limited support for pipeline deployments. | Supports pipeline deployments, enabling smoother CI/CD processes. |
To migrate from standard to enhanced version, go to the power platform admin center and go to the power pages sites.
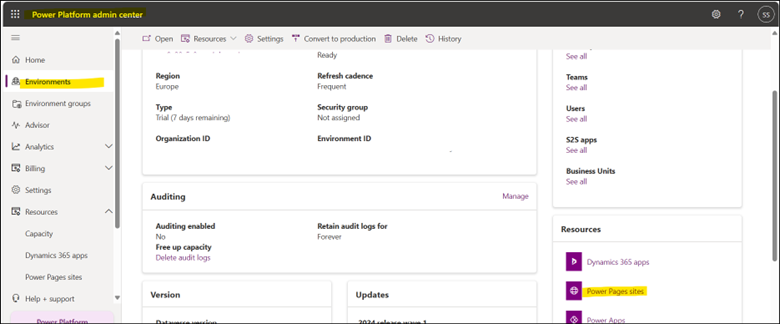
In power pages sites, turn on this feature.

So, I have turned this on.

As we can see there is a notification “Enhanced data model is enabled. All the new sites created in this environment will use this data model.” So, all the new sites created in this environment will be with the enhanced data model. But we are going to migrate the existing site to the enhanced data model.
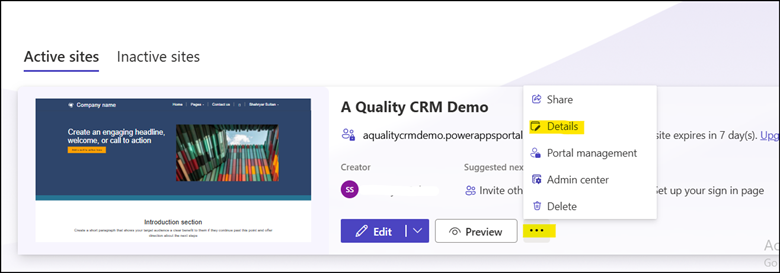
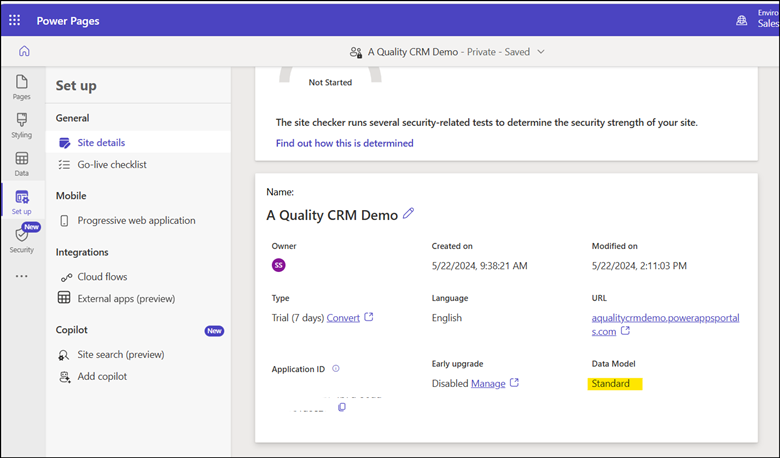
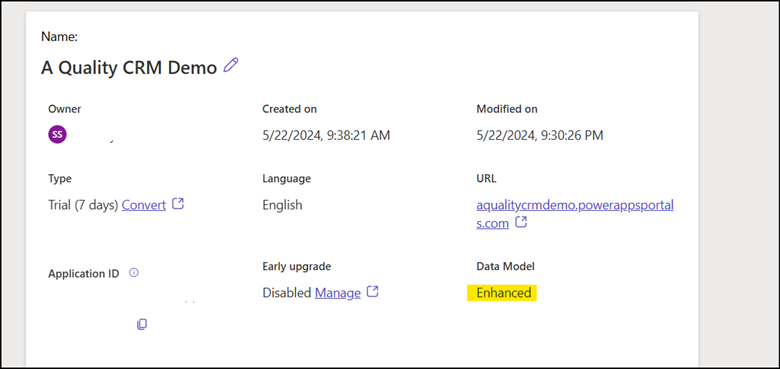
If we want to check if our site is already with enhanced data model or standard data model. Then we can check the details of the site.
As we can see the current site is with standard data model.
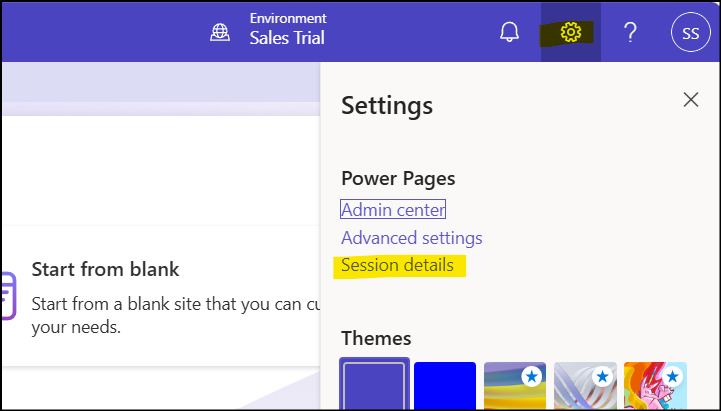
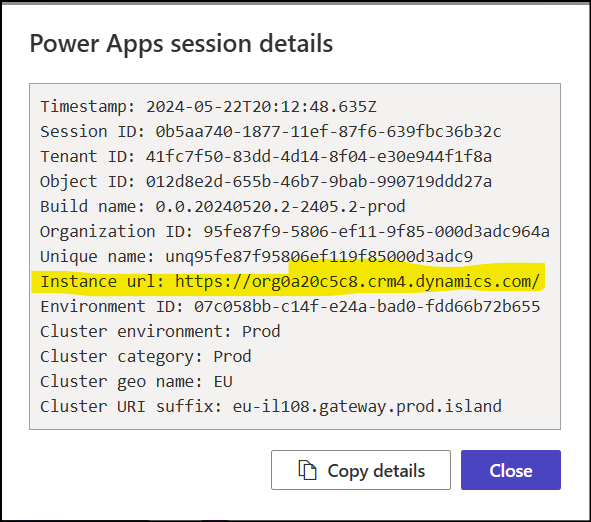
Now to migrate the website to the enhanced data model. We need the organization URL. To get the organization URL or instance URL we need to click the settings icon and then session details.
Before we dive into using the PAC CLI commands, let’s set up our environment to ensure a smooth workflow. Personally, I prefer using the PAC CLI within Visual Studio Code for the desktop. While you can use PAC CLI with PowerShell, Visual Studio Code offers a robust environment with a multitude of other features that can enhance your Power Platform development experience. If you don’t have Visual Studio Code installed yet, I highly recommend downloading it. Microsoft Learn provides detailed instructions for the installation process. Once you have Visual Studio Code installed, you’ll need to add the Power Platform tools extension. This extension includes the PAC CLI along with a host of other useful tools, ensuring your development environment is up-to-date and fully equipped.
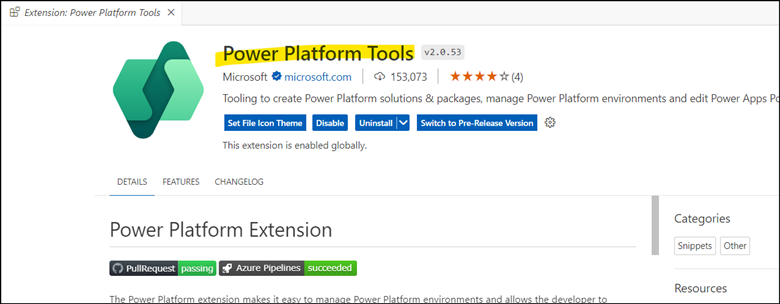
After installing and updating these tools, we can move on to running the PAC CLI commands. Open a new terminal in Visual Studio Code and get ready to connect to your Dataverse environment.
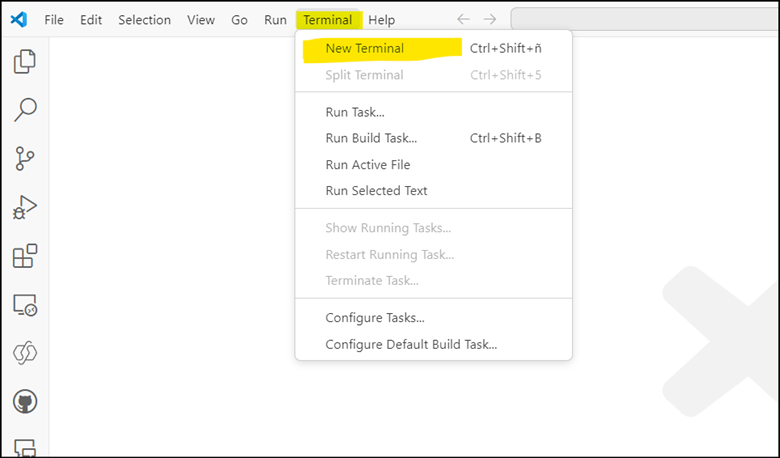
pac auth create –environment https://source environment URL/

It will ask you to login to the environment.
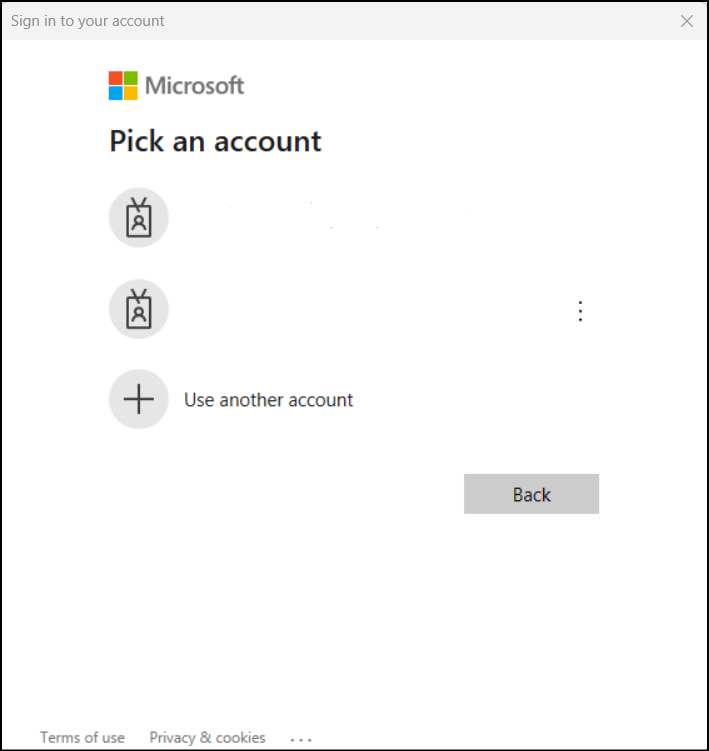
As we can see, the account is successfully authenticated.

Now, we will get the list of the power pages.
pac powerpages list
We have got the list. We have two sites in our organization.

Now, we will migrate the site using this command.
pac powerpages migrate-datamodel –webSiteId 95956e47-2318-ef11-9f89-000d3ad843c6 –mode all
Depending on your needs, you can migrate in three different modes: configuration data, transaction data, or all. Configuration data includes your standard portal metadata, while transaction data includes items such as multi-form step sessions, invites, ads, and polls. If you want to capture everything, you can choose to do it all in one shot.

Now by using this command we can check the migration status.
pac powerpages migrate-datamodel –webSiteId 95956e47-2318-ef11-9f89-000d3ad843c6 –checkMigrationStatus

Let’s move on to the next step: updating the data model version in our portal. To do this, we’ll use the PAC CLI command.
pac powerpages migrate-datamodel –webSiteId 95956e47-2318-ef11-9f89-000d3ad843c6 –updateDatamodelversion –portalID 6750fb03-8ac7-447c-9228-00c2aeea276e
First, we need to obtain the portal ID. To find the portal ID, navigate to your Power Pages site and visit the following URL: https://yoursite.powerappsportals.com/_services/about.
This URL will display the necessary portal ID. Once you have the portal ID, you’ll be ready to run the PAC CLI command to update the data model version.

Now, lets go to the portal and check the details of the portal site. I refresh the page, and now I can clearly see the data model is updated to enhanced version.
Writing all commands at one place:
pac auth create --environment https://source environment URL/
pac powerpages list
pac powerpages migrate-datamodel --webSiteId 00000000-0000-0000-0000-000000000000 --mode all
pac powerpages migrate-datamodel --webSiteId 00000000-0000-0000-0000-000000000000 --checkMigrationStatus
pac powerpages migrate-datamodel --webSiteId 00000000-0000-0000-0000-000000000000 --updateDatamodelversion --portalID 00000000-0000-0000-0000-000000000000
In conclusion, migrating from the standard to the enhanced data model in Power Pages offers significant benefits, including improved efficiency, streamlined data management, and enhanced performance. By following the steps outlined in this guide—from setting up your environment with Visual Studio Code and PAC CLI, exporting and converting your data, to updating the data model version—you can ensure a smooth transition. Embracing the enhanced data model not only optimizes your current setup but also prepares your Power Pages for future scalability and functionality enhancements. Don’t hesitate to start this migration process to leverage the full potential of Power Pages and Dataverse.

