Integrating Adobe Acrobat Sign with Microsoft Dynamics 365 (D365) streamlines your document management and e-signature processes, making it easier to manage contracts and agreements directly within Dynamics. This guide will help you understand how to set up and maximize Adobe Acrobat Sign in D365.
- Overview of Adobe Acrobat Sign and Dynamics 365 Integration
Integrating Adobe Acrobat Sign with Dynamics 365 enables businesses to:
- Send, sign, track, and file contracts within D365 without switching platforms.
- Deliver paperless, streamlined e-signature experiences to clients.
- Access and manage contracts across Dynamics 365 modules (Sales, Customer Service, Field Service) on any device.
- Key Features of Adobe Acrobat Sign for Dynamics 365
The integration provides powerful features to simplify document workflows:
- In-platform Sending and Signing: Send agreements directly from Dynamics 365, allowing recipients to sign from any browser or device.
- Automatic Document Management: Signed documents and audit trails are saved to customer records, making it easy to track agreements and maintain comprehensive records.
- Seamless Data Syncing: Merge data from Dynamics 365 into contracts and push signed data back into Dynamics.
- Status Tracking and Notifications: Track document statuses and set reminders to manage contracts effectively.
- Document Storage in SharePoint: Save signed documents to SharePoint for long-term storage and connect with other tools, including Adobe Acrobat Sign integrations with Power Automate, for advanced workflows.
- Global Compliance: Adobe Acrobat Sign ensures e-signatures meet legal standards worldwide, minimizing compliance risks.
- Getting Started with Adobe Acrobat Sign and Dynamics 365 Integration
Prerequisites
Before you begin, ensure you have:
- Adobe Acrobat Sign Account: Ensure your organization is subscribed to Adobe Acrobat Sign.
Get the trial account from here https://adobe.com/go/dynamics-sign-trial
- Dynamics 365 License: Dynamics 365 should be set up and accessible to users who will be managing contracts.
- Admin Access: Admin privileges in both platforms to authorize and configure the integration.
Step-by-Step Setup
Step 1: Install Adobe Acrobat Sign in Dynamics 365
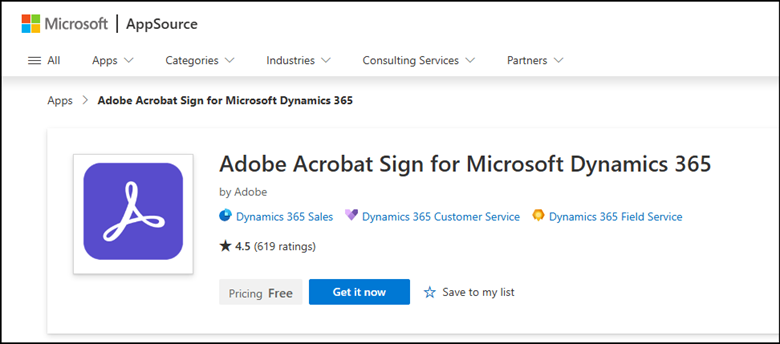
- Navigate to the Microsoft AppSource (Adobe Acrobat Sign for Microsoft Dynamics 365).
Search for “Adobe Acrobat Sign for Dynamics 365” and click Get it now.
3. Follow the on-screen instructions to add Adobe Acrobat Sign to your Dynamics 365 environment.
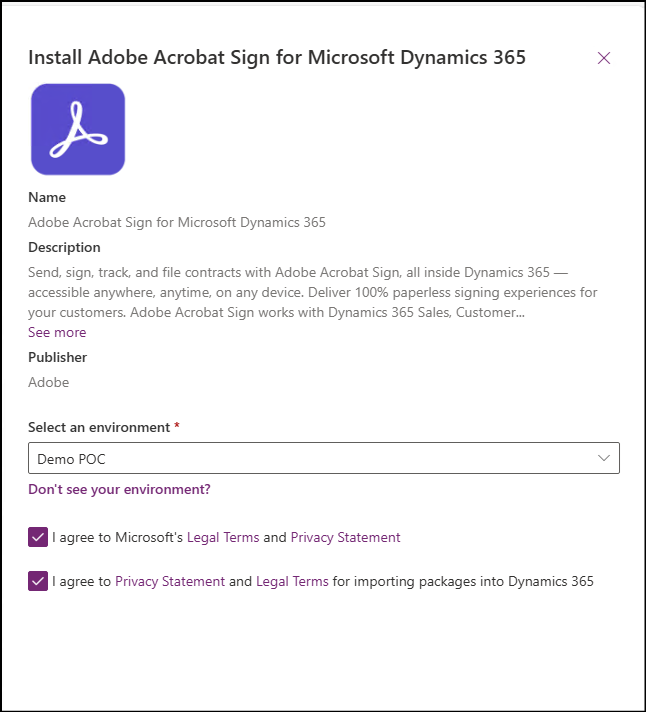
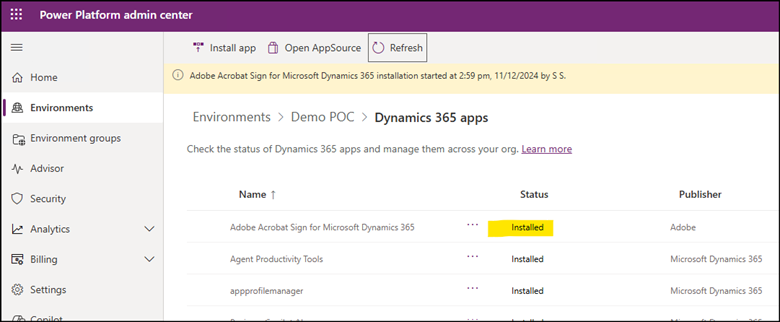
4. Once installed, open Dynamics 365 and verify the Adobe Sign application is available in the list of installed applications.
Step 2: Authorize Adobe Acrobat Sign in Dynamics 365
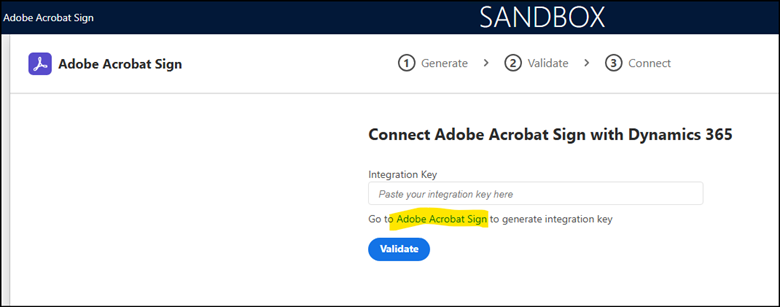
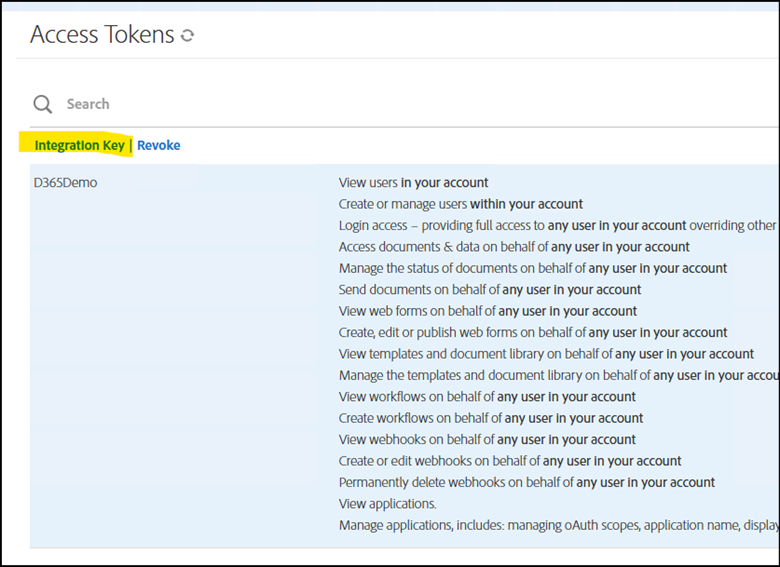
When you install Acrobat Sign for Microsoft Dynamics 365 online for the first time, you must generate an Integration key in Acrobat Sign and enter it into Dynamics 365 online environment. The integration key is the access token that authenticates the Acrobat Sign and Dynamics environments to trust each other and share content.
To generate an Integration Key in Acrobat Sign:
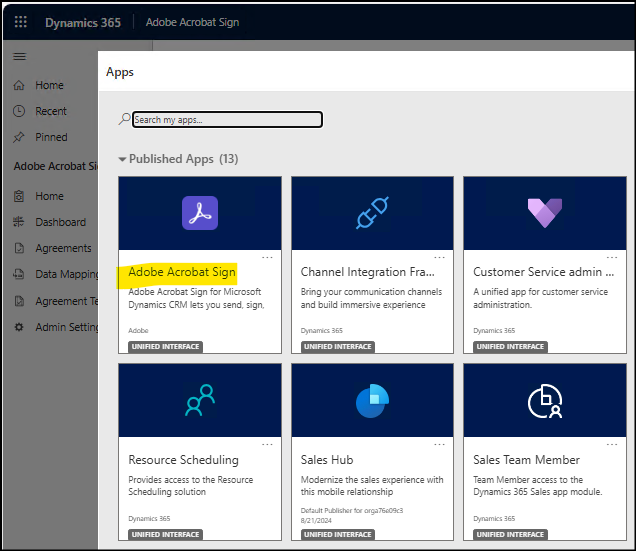
Go to the Adobe Acrobat Sign Application
From under the Integration Key field, select Go to Adobe Acrobat Sign to generate integration key.
https://secure.adobesign.com/account/accountSettingsPage#pageId::ACCESS_TOKENS
2. On the Acrobat Sign log-in page, log in using your admin credentials.
Your admin account email should be the same email address as your Dynamics admin.
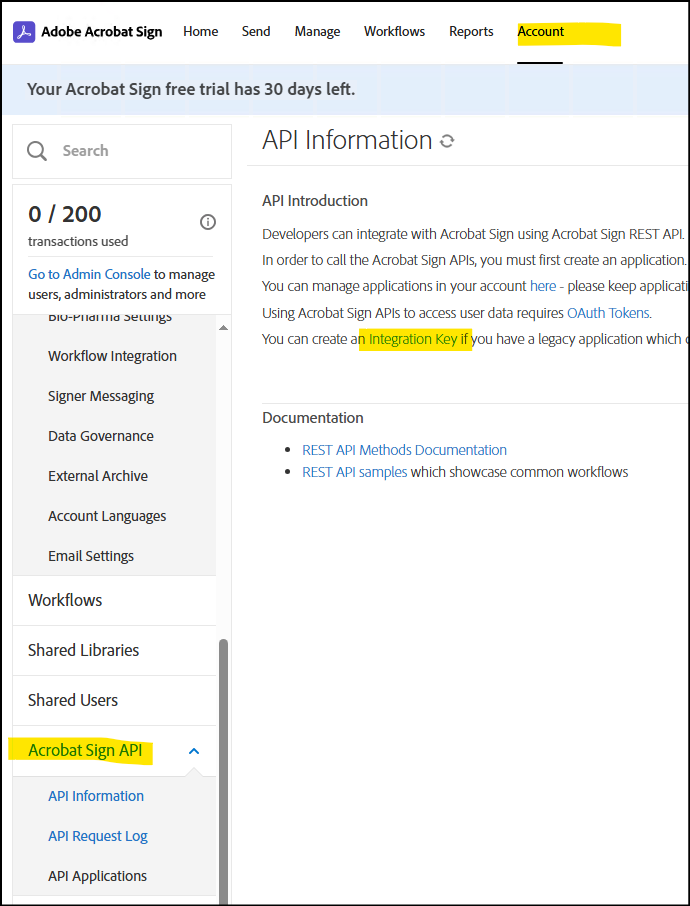
3. Navigate to Account > Acrobat Sign API > API Information. Next, select Integration Key.
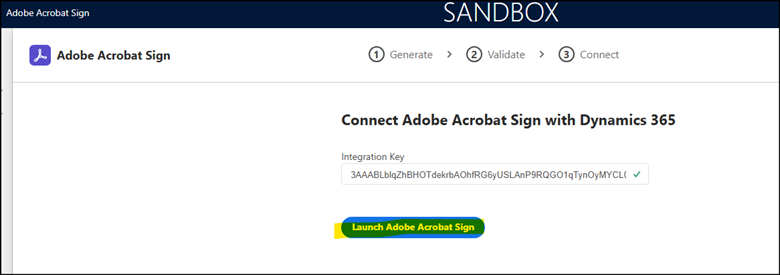
Once the page refreshes, the integration key is locked (with a green check mark indicating successful installation), and the Validate button changes to Launch Adobe Acrobat Sign.

Assign Security Roles
Every Dynamics user who is expected to use the Acrobat Sign application must have one of the following security roles configured in the Dynamics environment:
- Acrobat Sign Reader – Allows the user read-only access to Agreement records.
- Acrobat Sign User – Allows the user to work with Agreements and other application entities. This role permits the user to view only their records and allows User level access to built-in CRM records such as Contacts, Accounts, Leads, Opportunities, Orders, Invoices, and Quotes.
- Acrobat Sign Administrator – This role includes additional privileges in addition to the Acrobat Sign User role, such as adjusting Global Settings, Data Migration, and allowing visibility over all Agreements throughout the application.

Configure real-time automatic status updates with Power Automate
You can enable the ‘Real-time automatic status updates’ feature, which uses Acrobat Sign webhooks to trigger a Power Automate flow whenever an agreement status changes.
To enable real-time agreement status updates:
On the Power Automate page that opens:
- From the left panel, select Connectors.
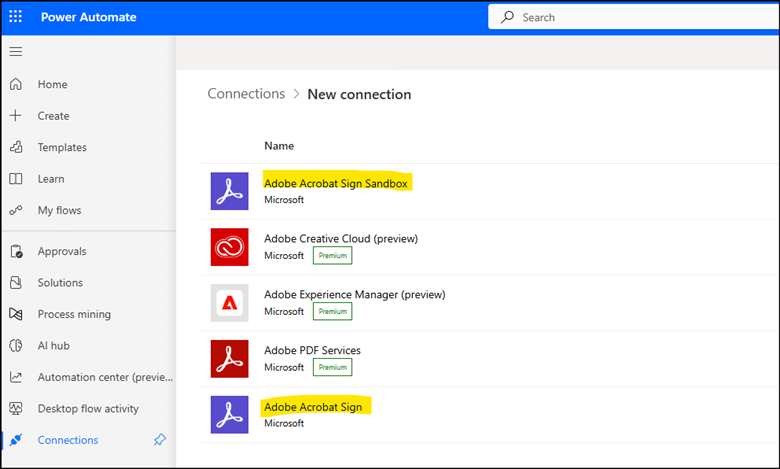
- In the Search connector bar, search for Adobe Acrobat Sign and then select Adobe Acrobat Sign from the list of available options.
It adds the Adobe Acrobat Sign connector to your Power Automate list of connectors.
From the left panel, select Templates and then use the search bar to find and add the Update Dynamics Agreement record on the agreement state change in Adobe Acrobat Sign.

Modify Acrobat Sign Admin Settings
You can build templates, map data, and create custom workflows using the admin tools and configuration settings available on the Acrobat Sign Admin Settings page.
To access and modify the settings:
- Navigate to Adobe Acrobat Sign > Admin Settings.
- On the Admin Settings page, access the required tools under the different tabs, as described in the following steps.
- Under Account and Setup, you can:
- Access the Integration key for initial account setup.
- Check the account setup status.
- View the following account setup checklist:
- Link Adobe Sign to Dynamics 365 – Shows a green checkmark when the Integration key is successfully installed.
- Display Legacy Form Rendering in Dynamics 365 – Shows a green checkmark when Legacy Form Rendering is disabled.
- Real-time automatic status updates with Power Automate – Shows a green checkmark when real-time updates are configured.


You can associate your agreements with the following built-in CRM entities included in the Adobe Acrobat Sign package:
- Contacts
- Accounts
- Leads
- Opportunities
- Quotes
- Invoices
- Orders
- Contracts
Custom entities can only start an agreement from the Request Signatures menu item. You cannot use the Quick Create system to start an agreement from a custom entity.
You can add your custom CRM entity or any other built-in CRM entity to this scope using simple steps, as explained in the following steps. The example setup explains how to add a custom CRM entity called ‘Customer.’
- Best Practices for Managing Documents in Dynamics 365 with Adobe Acrobat Sign
- Use Templates: Create reusable templates for standard contracts or agreements to save time.
- Implement Notifications: Set reminders and status updates to manage document workflows proactively.
- Utilize Automated Data Entry: Streamline data entry by mapping Dynamics 365 fields to document templates, reducing manual work.
- Maintain Compliance: Adobe Acrobat Sign’s global compliance ensures documents meet international legal standards, reducing risks.
- Store Securely: Use SharePoint or a preferred storage system to manage document storage efficiently.
By integrating Adobe Acrobat Sign with Dynamics 365, you’ll enhance contract management, increase deal speed, and deliver secure, compliant e-signatures. Use the steps above to set up and optimize this integration for smooth, automated workflows that meet your business needs.
For more detailed guidance, Adobe’s official integration page provides further resources and troubleshooting tips.
Part two eSign document using Power Automate with Adobe Acrobat Sign


