In this blog post, we are going to explain how we can create a lead in Dataverse based on the form entry from the web portal. Today portals are playing a vital role between organizations and customers. Portals serve as a gateway for customers, organizations, employees, and partners to interact with organizational data and processes within Dynamics 365.
In this way, web forms play a crucial role in collecting data from customers and their feedback. Webforms can be primary sources for information input, request submissions, and engage with organizations through portals.
- Power Portal: This is a special website built within Dynamics 365 that allows you to connect with customers, partners, and employees outside your organization.
- Dataverse: This is Microsoft’s cloud-based data storage platform where you can store and manage all your customer information, including the leads you capture from your website forms.
- Leads Entity: This is a specific type of data record in Dataverse that’s designed to store information about potential customers, like their name, email address, and interests.
The purpose of this guide is to explain the process of configuring PowerPages within Dynamics 365 CRM Portals. By providing a step-by-step walkthrough, best practices, and optimization techniques, it allows users to rein the full potential of web forms for data collection, customer engagement, and process automation. Whether you’re a CRM administrator, developer, or business user, this guide will help you with the knowledge and tools to create in-built, efficient, and user-friendly web forms tailored to your organization’s needs.
Now we will configure the webform in Dynamics 365 portal step by step.
Step 1: Create the Power Pages Website. I assume that you have already created it. You can create that from the below URL.
https://make.powerpages.microsoft.com/
If you want to know how to create a website in Power Pages then you can check the following link.
I have already created a PowerPages site that I am using for this purpose. If you want to know how to create a PowerPages site then you can check that here
Step 2: Now, we will go to the Power Pages Management App. This app is available in the same environment as you created the Power Pages website.
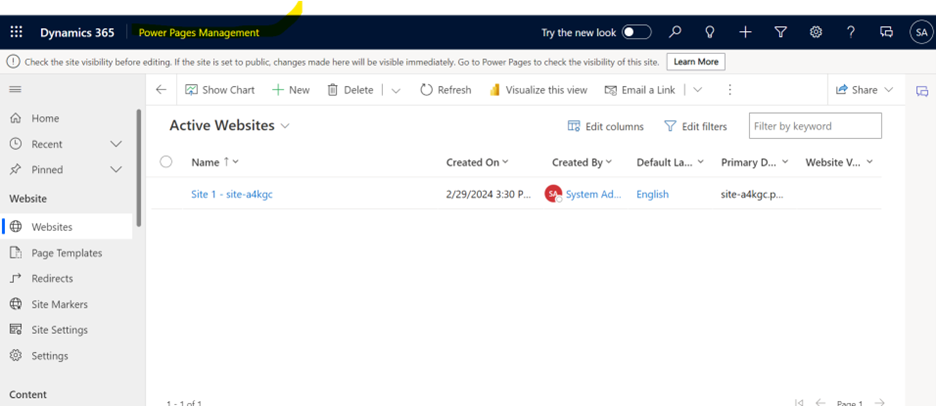
Step 3: We will create a form in the Power Pages Management app that we want to show on the webpage.
I have already created a form with the name Lead Creation. Select the website that you created in the first Step 1.
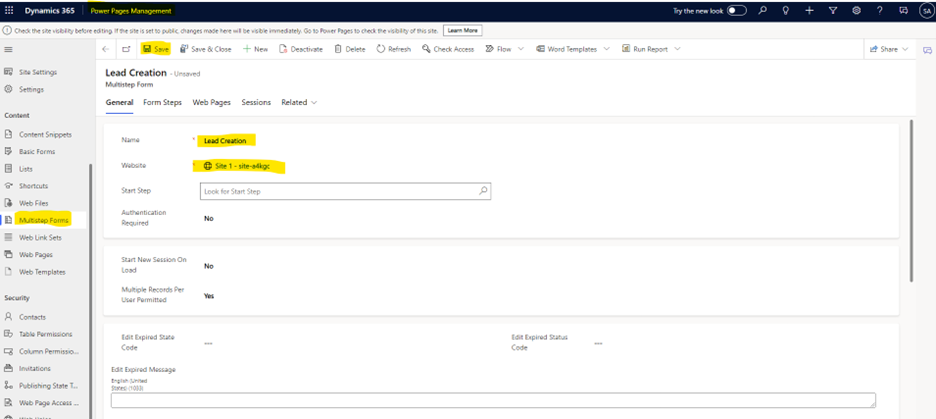
Step 4: Please go to the form steps. Here we will add the form steps.
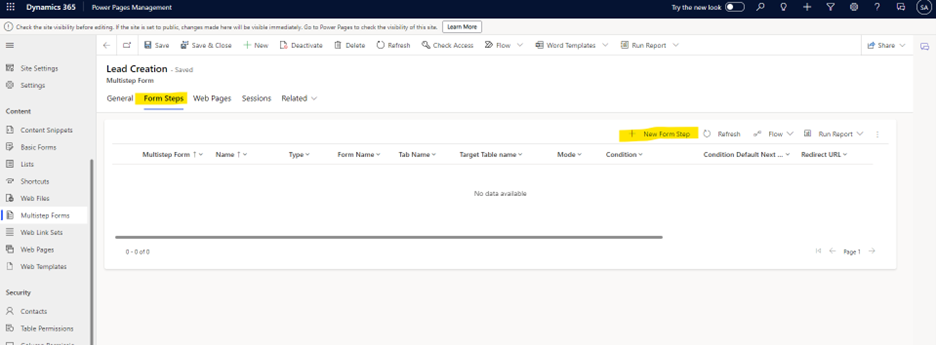
Step 5: Please add the New Form Step
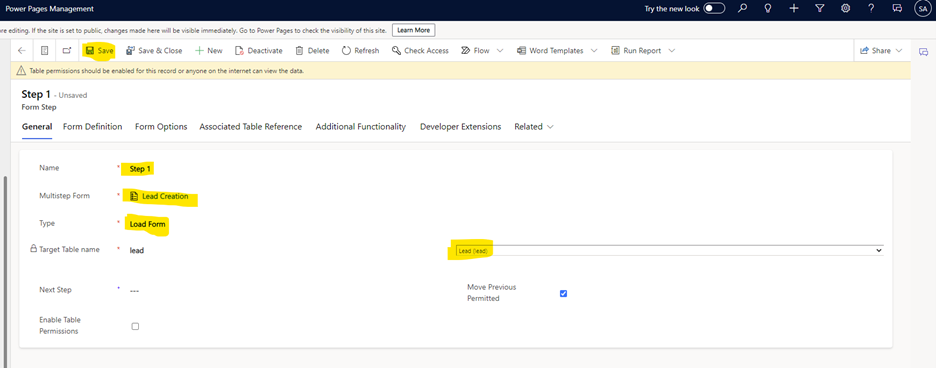
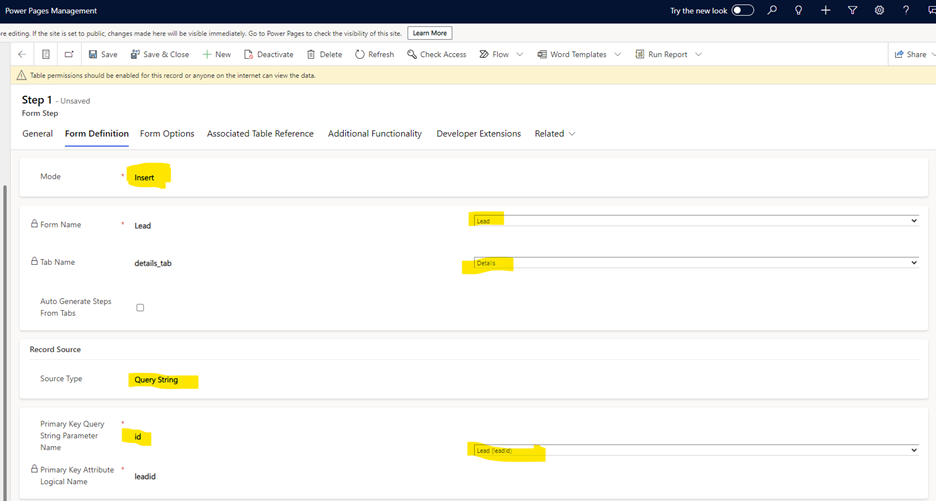
Step 6: Please go to form definition tab and enter the details as mentioned below.
Step 7: After creating the first step, we will create a step 2.
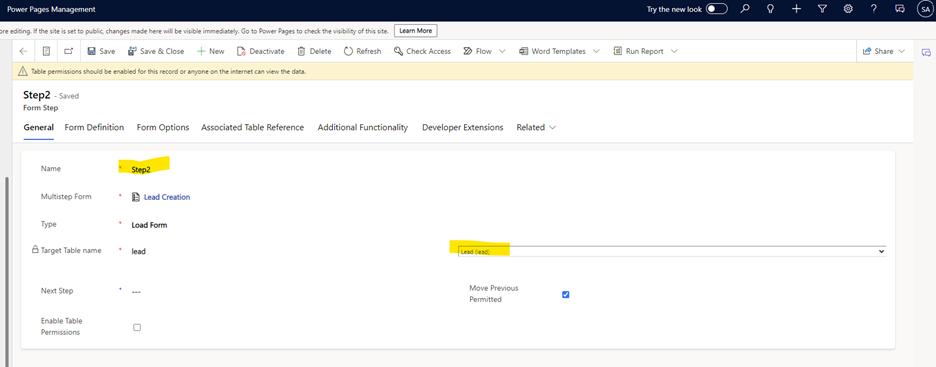
Step 8: Now for the 2nd step we will add the form definition as we did for step 1.
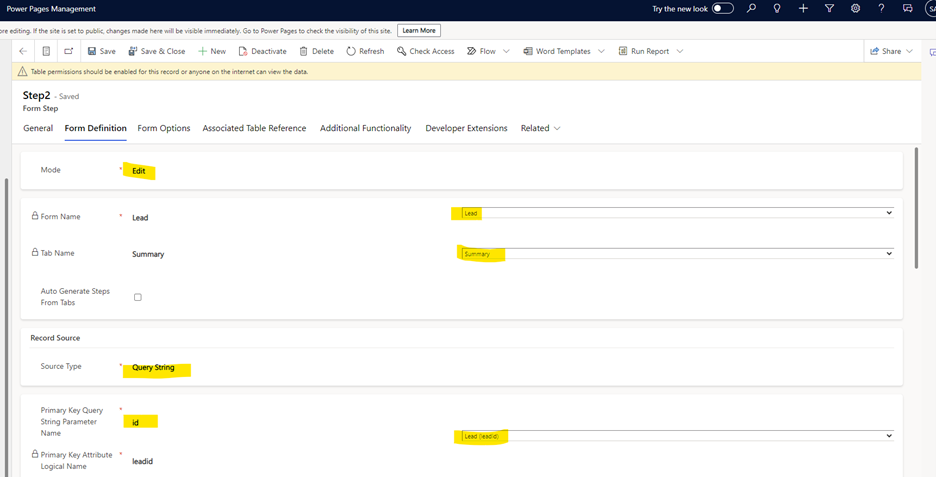
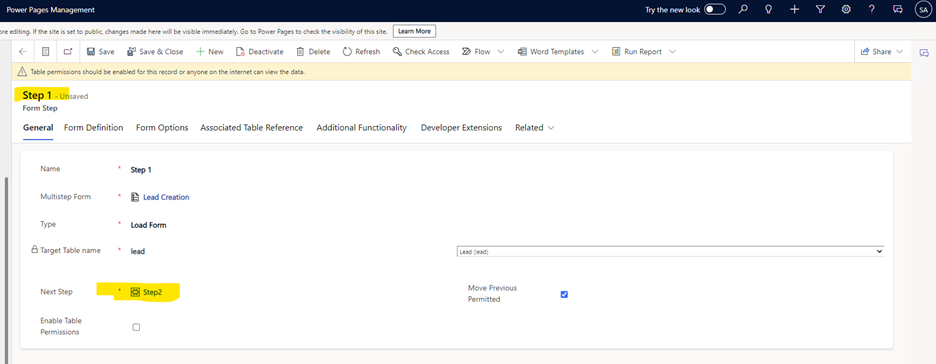
Step 9: Open Step 1 and then select the Step 2 in the Next step.
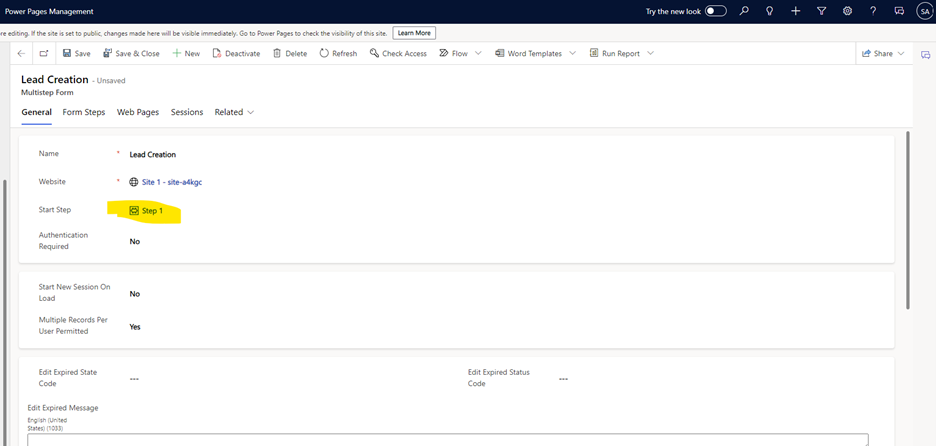
Step 10: Now we will go to the Lead Creation form that we created in step 5 of this practice.
Step 11: Now we will create a new subpage on the portal and will add the form on that page.
Step 12: Go to the PowerPages portal and select the site where we want to insert the lead form.
You can access the PowerPages here https://make.powerpages.microsoft.com/
We have already created the site. I assume that you have created the site in Step 1.
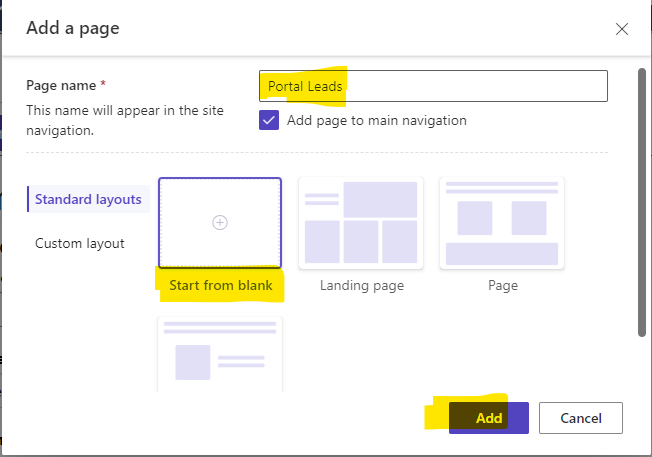
Step 13: Add a new page to the site from the site designer. I added a new page named Portal Leads. This is a blank page.
Here you can see in detail how to create a page on the PowerPages website?
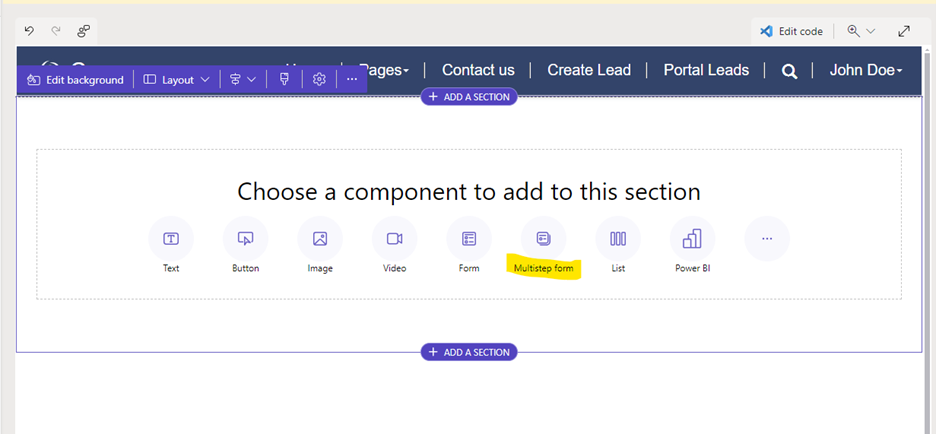
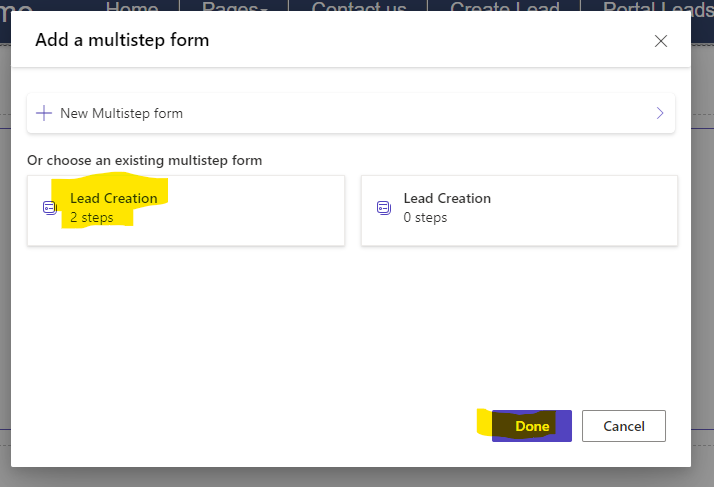
Step 14: Insert the multiselect form on the page that we created in Step 5.
We can also see the two steps that we added on the form.
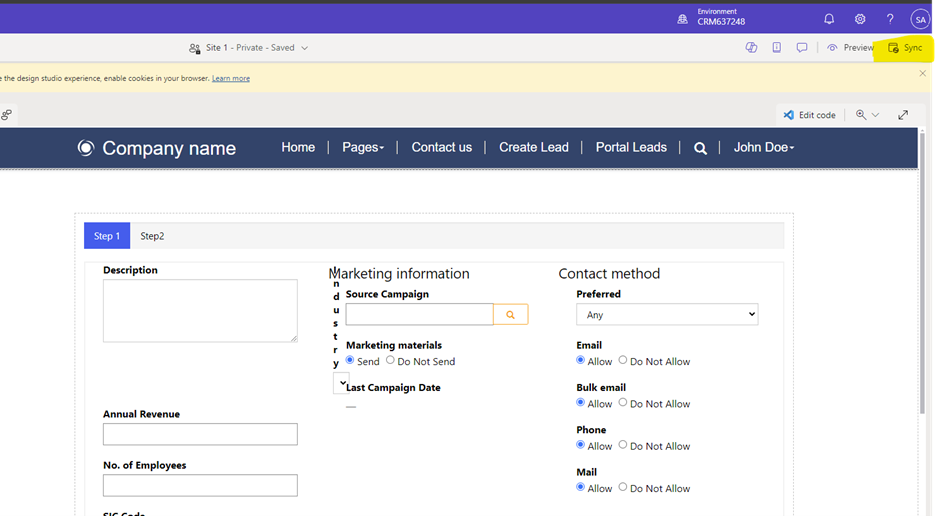
After inserting the form, sync the webpage and preview.
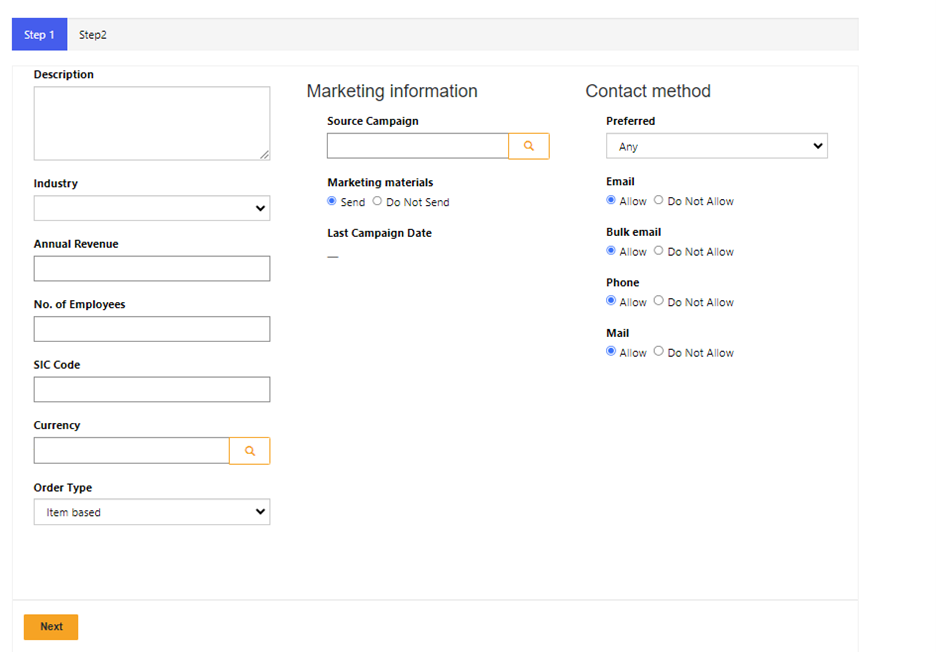
Here is the preview of the webpage.
Step 15: On the lookup fields you may encounter an error for not having access to the lookup fields as shown below in the figure.
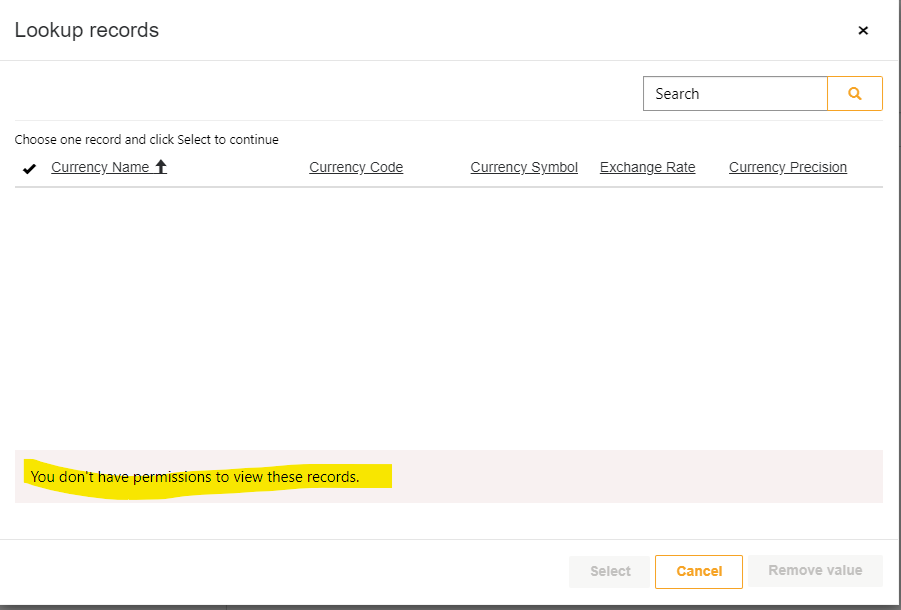
So, to resolve this issue we will add the record in the permission table.
Step 16: To resolve this issue, please go to the portal management app. The portal management app will be available in the same environment where you will be creating the PowerPages site.
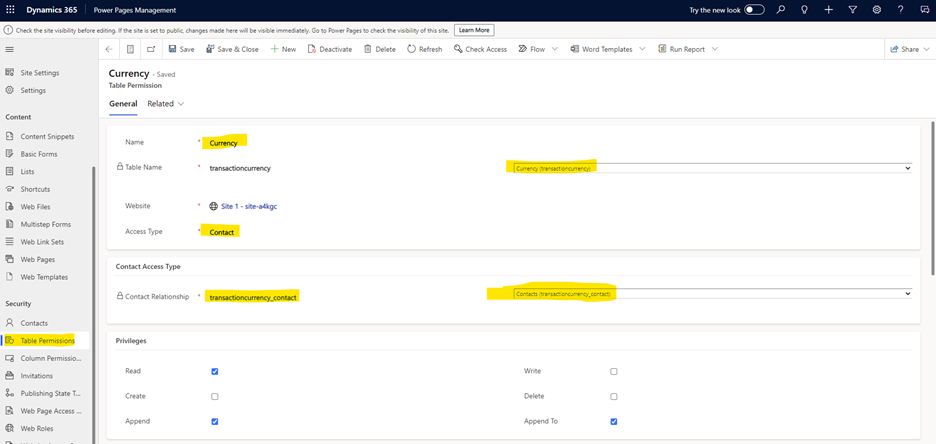
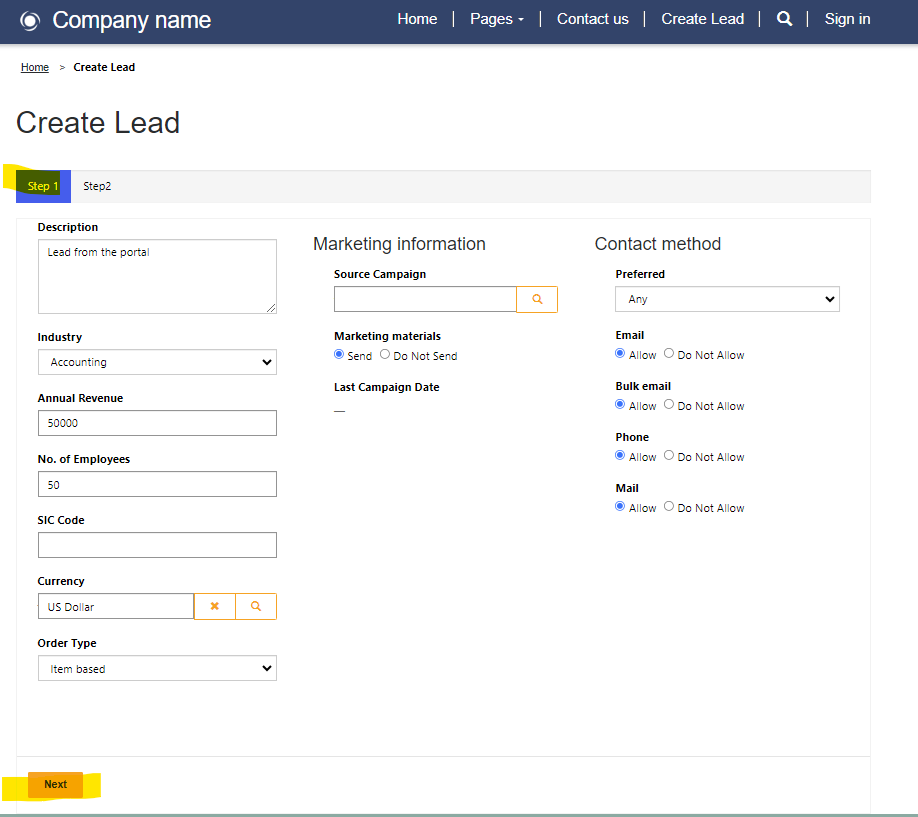
Step 17: After resolving all the permission issues, lets try to insert the data into the form.
2nd page of the lead
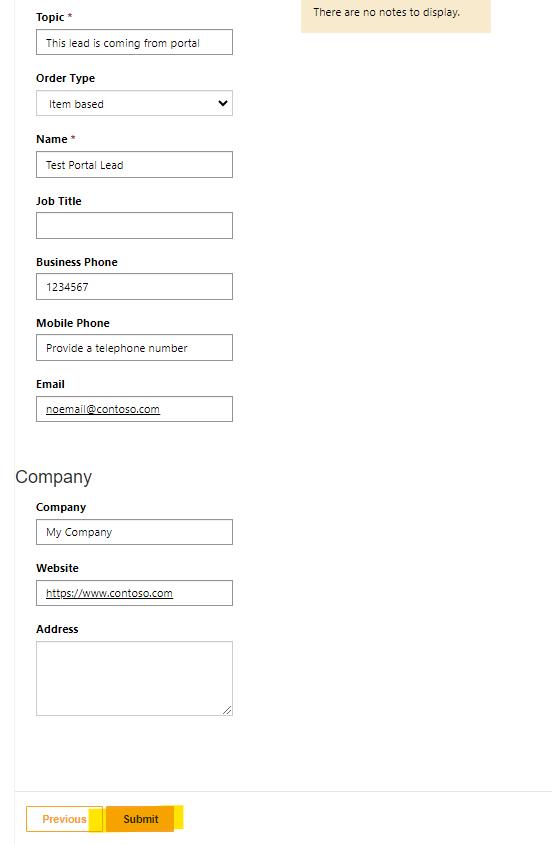
Lead is successfully submitted.

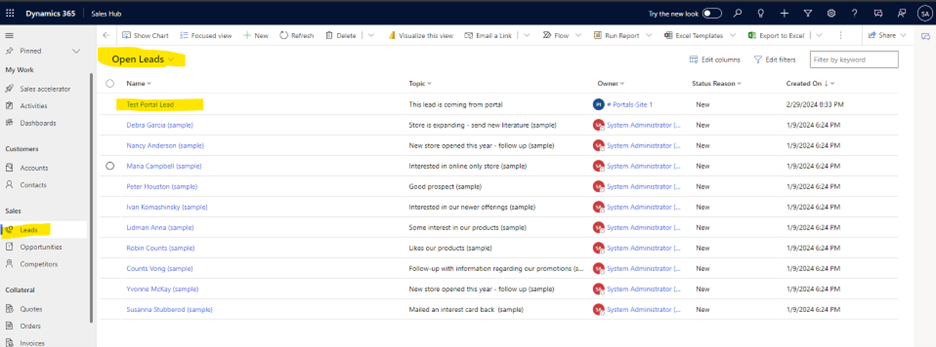
Now, if we investigate our sales app. Then there will be a lead record.
In conclusion, configuring web forms within Dynamics 365 CRM Portals is an indispensable process for organizations looking to enhance customer engagement, streamline data collection, and drive business growth. By following the steps outlined in this guide and implementing best practices for form design and optimization, users can leverage the full potential of web forms to create seamless user experiences and unlock valuable insights from their CRM data. Empower your organization with effective web form configurations and elevate your CRM portal experience to new heights.
General FAQs
- What is the purpose of web forms in Dynamics 365 CRM Portals? Web forms in Dynamics 365 CRM Portals serve as interactive tools for users to input data, submit inquiries, and engage with organizations online. They facilitate various processes such as lead capture, support requests, event registrations, and more.
- How do I create a new web form in Dynamics 365 CRM Portals? To create a new web form, navigate to the CRM portal interface, access the web forms section, and follow the step-by-step instructions provided in the configuration guide. Customize form fields, settings, and properties to suit your specific requirements.
- Can I integrate web forms with CRM entities? Yes, web forms can be seamlessly integrated with CRM entities in Dynamics 365 CRM Portals. Users can map form fields to CRM entity attributes, establish data relationships, and ensure data synchronization between the portal and CRM system.
- What are some best practices for optimizing web form performance? Optimizing web form performance involves designing user-friendly layouts, optimizing load times, ensuring mobile responsiveness, and utilizing analytics to track form effectiveness. Employing these best practices enhances user experience and maximizes the impact of web forms.
- How can I track the effectiveness of web forms in Dynamics 365 CRM Portals? Users can leverage analytics and reporting features within Dynamics 365 CRM Portals to track form submission metrics, analyze user behavior, and gain insights into form effectiveness. These insights enable organizations to make informed decisions and continually improve their portal experience.


