How to Import Leads into Microsoft Dynamics 365 or Power Apps Using Power Automate Flow
Microsoft Dynamics 365 and Power Apps are excellent platforms for managing your business’s leads. One of the most effective ways to streamline your lead generation process is by using Power Automate to automate the import of leads into Dynamics 365 or Power Apps from SharePoint. In this blog, I will walk you through how to set up a Power Automate Flow that automatically imports leads from a SharePoint folder, checks for existing leads, and either updates them or creates new ones.
The Workflow Overview
The process involves the following steps:
- Create a SharePoint folder for uploading leads.
- Set up a Lead Template for data structure.
- Create a Lead Import folder for uploading lead files.
- Build a Power Automate flow to:
- Monitor the SharePoint folder for new uploads.
- Parse the uploaded file for lead data.
- Find existing leads by matching on email.
- Update the lead if a match is found or create a new lead if no match is found.
Step 1: Set Up a SharePoint Folder
We will use SharePoint as the location where the lead files will be uploaded. This allows for easy collaboration and structured storage. Let’s go through how to create the folders and the template.
1.1 Create a Lead Template
Create a lead template that your team can use to input lead data, ensuring consistency in the file structure. For example, this could be an Excel file or CSV file with the following columns:
- First Name
- Last Name
- Email Address
- Phone Number
- Company
- Job Title

Upload this template into a SharePoint folder named Lead Template. This template can then be downloaded by your team, filled out with lead data, and uploaded to another folder for processing.
1.2 Create a Lead Import Folder
Now, create another folder named Lead Import where your team can upload the filled-out lead files. This will be the folder that Power Automate monitors for new uploads.

Step 2: Create a Power Automate Flow
Once the SharePoint structure is set up, we can create a Power Automate Flow that will process the uploaded lead files and import the data into Microsoft Dynamics 365 or Power Apps.
Here’s how to set up the flow:
2.1 Select SharePoint as a Trigger
- Open Power Automate and create a new flow. Select the Automated Flow template.

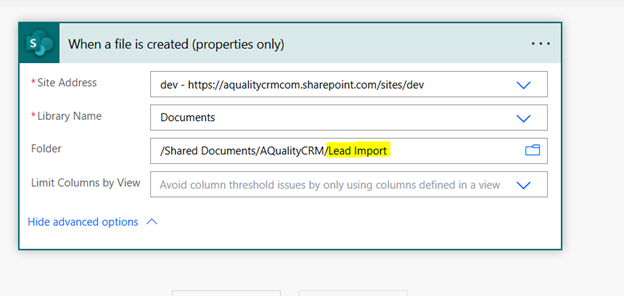
- For the trigger, choose When a file is created (SharePoint). This trigger will monitor the Lead Import folder for any new files.

- Specify the SharePoint site and the Lead Import folder you created earlier.
2.2 Parse the Uploaded File for Lead Data
You will need to parse the file content to extract the lead data. If you are using an Excel or CSV file:
- Use the List rows present in a table action (for Excel) or the Get file content action (for CSV).
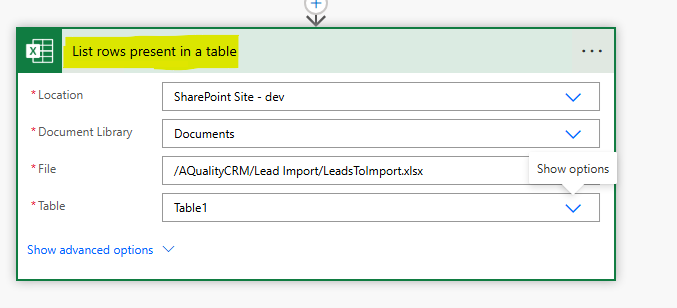
- Map the rows in the file to variables that represent the lead data (First Name, Last Name, Email, etc.).
2.3 Find a Match via Email in Dynamics 365 or Power Apps
Once the lead data is parsed, we need to check if a lead with the same email address already exists in Dynamics 365 or Power Apps. To do this:
- Use the List rows action from the Dataverse connector to search for existing leads in Dynamics 365 or Power Apps by their email address.
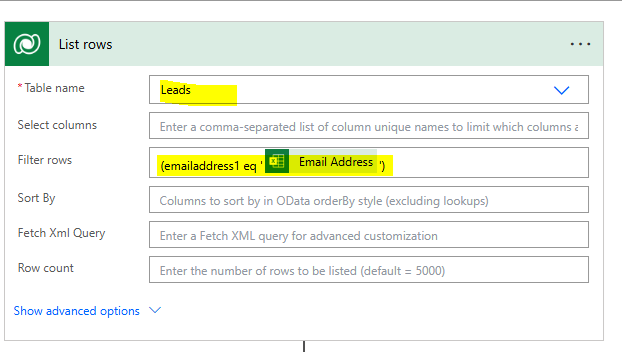
- In the Filter Query field, input:
emailaddress1 eq ‘parsed_email_address’
This query filters the existing leads to find any that match the email address in the uploaded file.

2.4 Update or Create Lead Based on the Match
Now that we have searched for the lead by email, we can perform one of two actions:
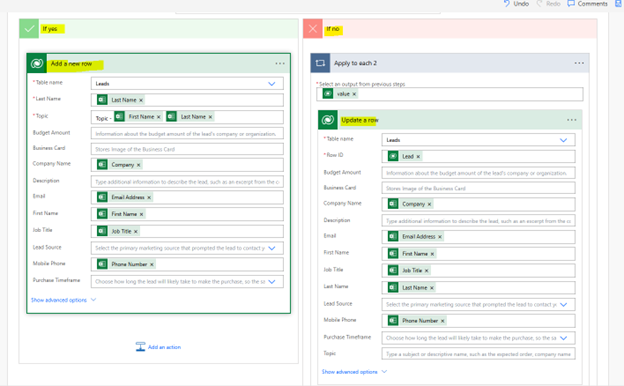
2.4.1 Update the Lead if a Match is Found
If a lead with the same email address is found:
- Use a Condition action in Power Automate to check if the result of the List rows action is not empty (indicating a match).
- If a match is found, use the Update row action from the Dataverse connector to update the lead with any new information from the uploaded file (e.g., update their job title, phone number, etc.).
2.4.2 Create a New Lead if No Match is Found
If no matching lead is found:
- Use the Condition action to check if the List rows result is empty.
- If no match is found, use the Create a new row action from the Dataverse connector to create a new lead in Dynamics 365 or Power Apps using the parsed data (First Name, Last Name, Email, Phone Number, etc.).
Final Flow Summary
Here’s a quick summary of how the flow works:
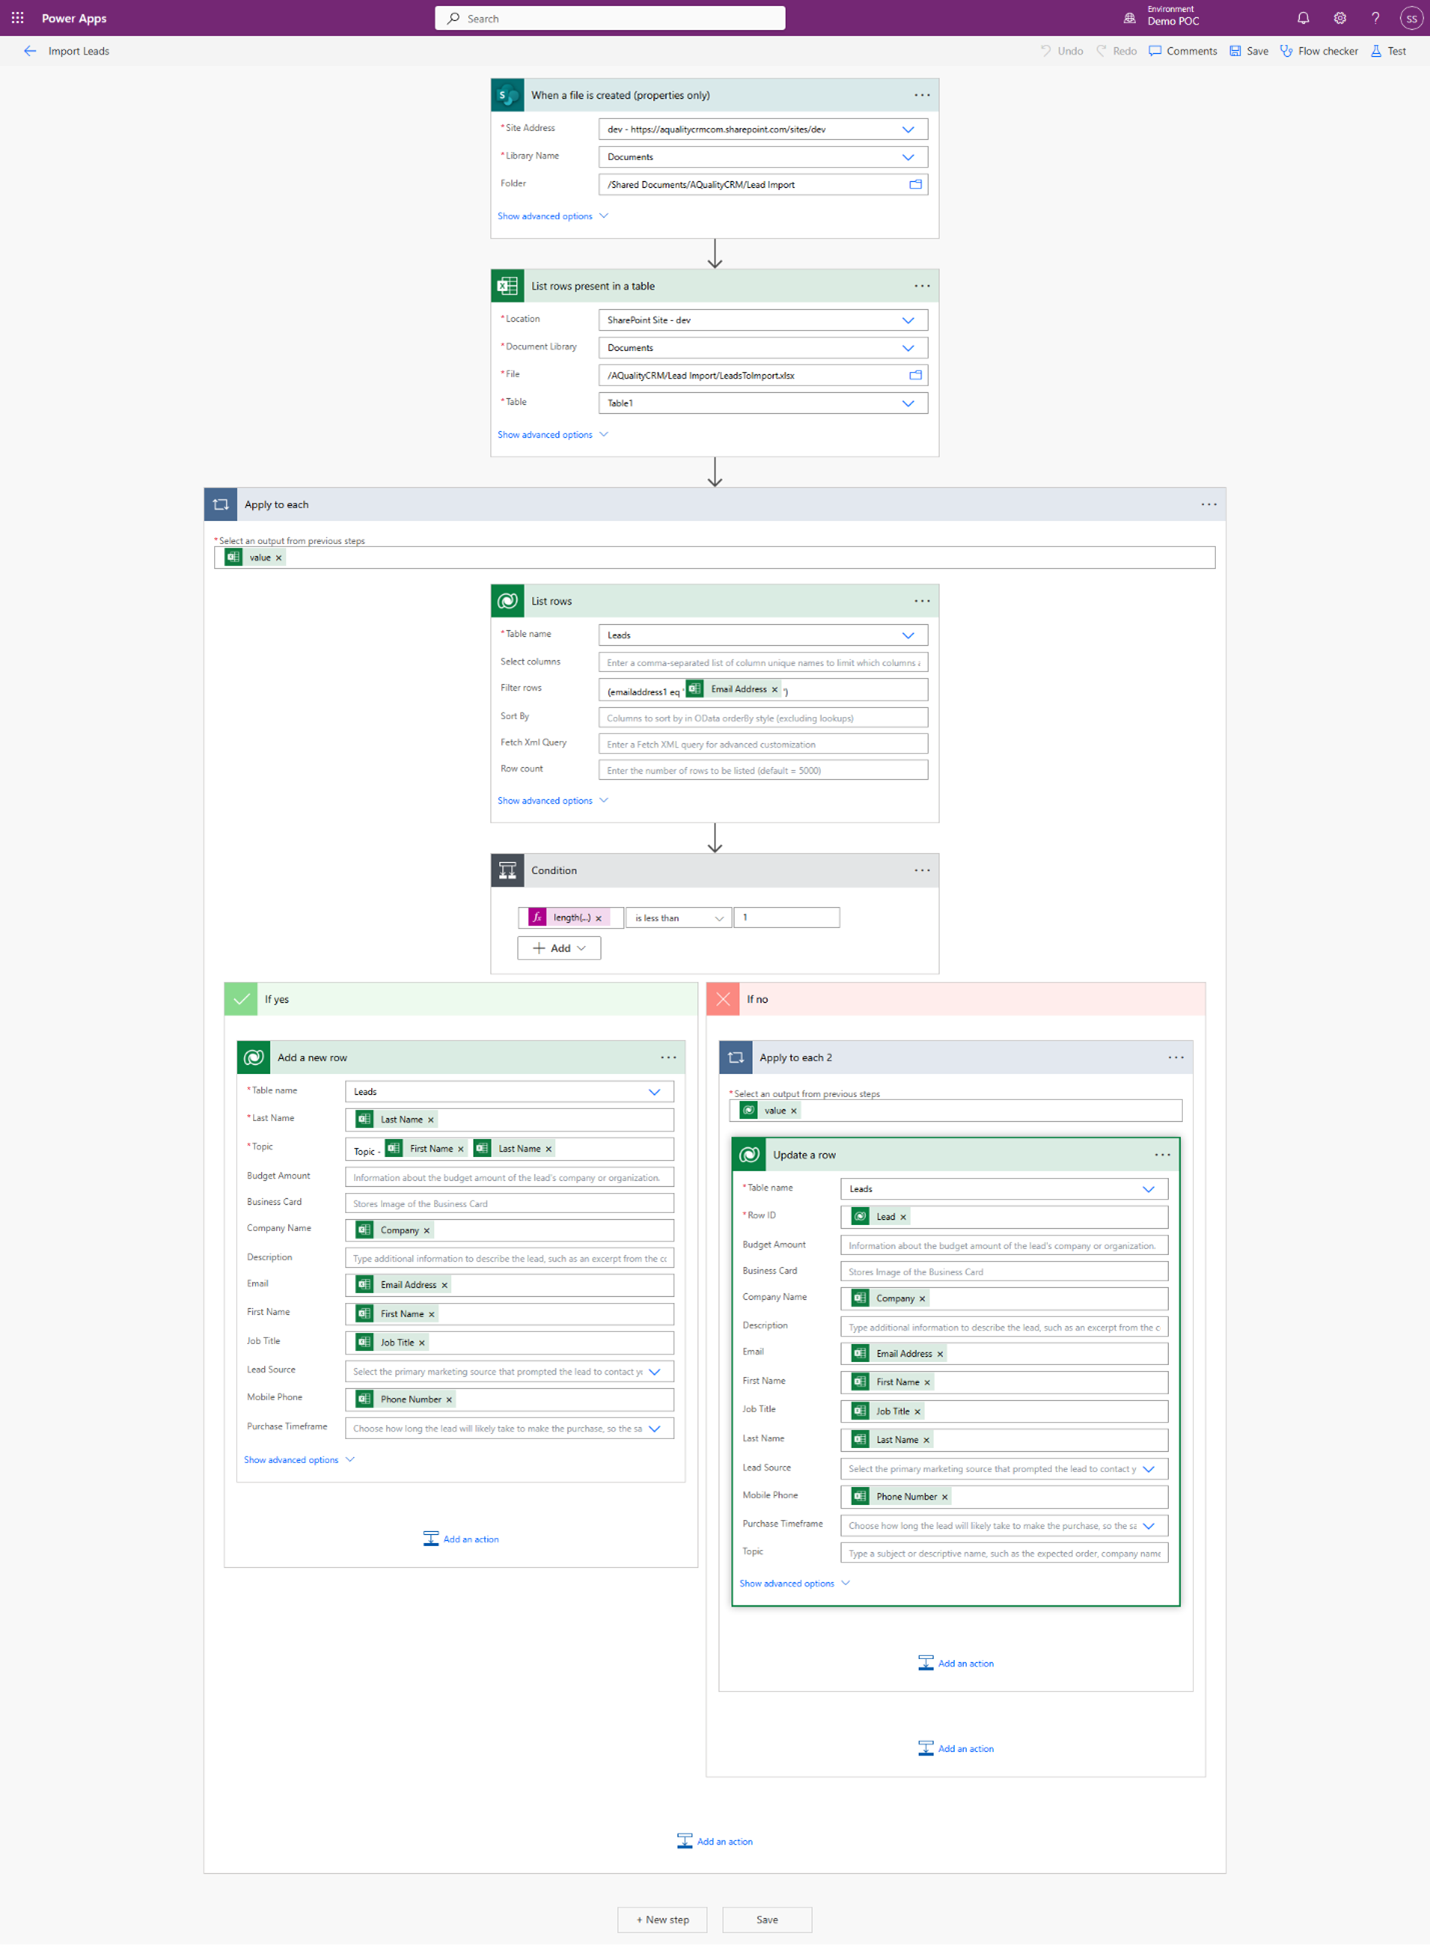
- Trigger: Monitors the SharePoint Lead Import folder for new files.
- Parse the File: Extracts lead data from the file.
- Find Match: Searches for a lead in Dynamics 365 or Power Apps by the email address.
- Condition:
- If match is found: Updates the existing lead.
- If no match is found: Creates a new lead.
Conclusion
By following this step-by-step process, you can set up an efficient workflow that automatically imports leads into Microsoft Dynamics 365 or Power Apps from a SharePoint folder. This automation saves time and ensures that your lead data is always up to date, without the need for manual imports. You can also customize this flow to handle other lead fields or additional business logic specific to your company’s needs.
With Power Automate, SharePoint, and Dynamics 365 working together, you can streamline your lead management process and focus on growing your business!


